
Construction Quality Management: A Practical Guide for Contractors

Introduction: Why Quality Management Makes or Breaks a Construction Project
Every construction project comes with a contract, a set of drawings, and a set of specifications. Most contractors read them carefully before bidding. Far fewer have a structured system to make sure those requirements are actually met in the field — day after day, pour after pour, inspection after inspection.
That gap between what the documents require and what actually gets built is where quality failures live. And quality failures are expensive. Construction rework costs the U.S. industry billions of dollars every year. Most of that rework is preventable. Most of it traces back to one of three root causes: a missed inspection, an unclear responsibility, or documentation that wasn’t completed when it should have been.
This guide exists to help you close that gap.
It is written for U.S. construction professionals — QA/QC inspectors, superintendents, field engineers, project managers, concrete contractors, rebar contractors, and the owners and operations managers of small and mid-size construction companies who need a practical quality system but don’t have a full-time quality department.
You do not need a 200-page quality manual to build a construction quality system that works. You need clear roles, consistent inspection practices, good documentation habits, and the right forms at the right time. That is what this guide covers.
What Is Construction Quality Management?
Construction quality management is the structured set of activities a project team uses to ensure that the work being built conforms to the contract documents — the drawings, specifications, approved submittals, and applicable standards.
It encompasses two related but distinct functions:
Quality Assurance (QA)
Quality assurance is about the system and the process. It asks: Do we have the right procedures in place to prevent defects from occurring?
QA is proactive. It includes writing inspection plans, conducting pre-activity meetings, reviewing approved submittals before work begins, confirming the right materials are on site before installation, and training field staff on what to look for and what to document.
QA is largely a management and planning function. It happens before the work starts.
Quality Control (QC)
Quality control is about verifying the work in the field. It asks: Does the work that has been installed conform to the requirements?
QC is reactive in the sense that it happens as work is performed or immediately after. It includes pre-pour rebar inspections, concrete cover measurements, lap splice verification, observation of concrete placement, and review of daily inspection records.
QC is largely a field function. It happens during and after the work.
Both are required. A project with strong QC but no QA will fix problems reactively but never build the system to prevent them. A project with strong QA but no QC will have excellent plans that no one verifies in the field. Effective construction quality management requires both working together.
To learn more about how Quality Jobsite approaches these tools and who builds them, visit the About page.
The Foundation: Specifications and Approved Drawings
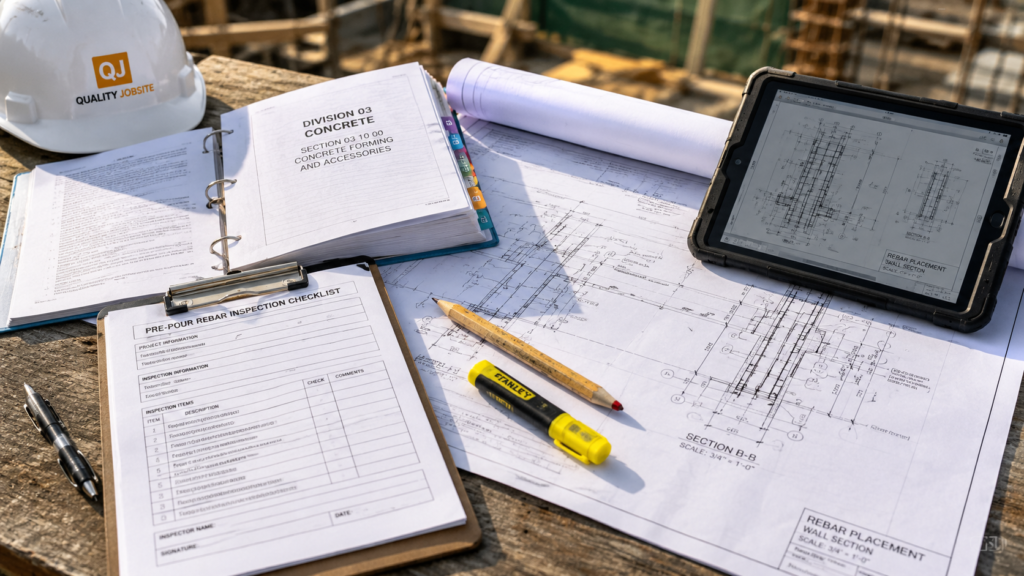
Before any inspection happens, every member of the quality team must understand what they are inspecting against. That means reading and understanding three documents:
1. The Project Specifications
Specifications are the written technical requirements for materials and workmanship. On most U.S. construction projects, they follow the Construction Specifications Institute (CSI) MasterFormat division structure. Concrete reinforcement typically falls under Division 03 — Concrete, Section 03 20 00 — Concrete Reinforcing.
The spec tells you: what grade and type of rebar is required, what standards apply (ASTM A615, ASTM A706), what submittals are required before work begins, what hold points require inspection, and what documentation must be maintained.
Read it before you inspect. Not after.
2. The Structural Drawings
The structural drawings tell you the specific requirements for this element — bar sizes, locations, spacing, cover, splice lengths, hook dimensions, and reinforcement quantities. The specifications set the general requirements. The drawings set the project-specific requirements.
When the two conflict, the contract terms dictate which controls. On most projects, the drawings take precedence for dimensional and locational requirements, while the specifications control material and workmanship standards.
3. Approved Submittals
Before reinforcing steel is delivered to the site, the contractor must submit and obtain approval for:
- Shop drawings (placing drawings): Bar bending schedules, placement diagrams, and cut lists prepared by the rebar fabricator
- Mill Test Reports (MTRs): Certified test records from the steel mill confirming that the bars meet the specified ASTM standard and grade
- Product data: For specialty items such as mechanical couplers, epoxy-coated bar, or headed deformed bars
No work should be inspected against unapproved submittals. Verify that the submittals on file are approved before the first bar is placed.
Inspection Planning: The ITP
The single most important document in a construction quality system is the Inspection and Test Plan (ITP).
An ITP is a structured matrix that lists every significant construction activity, identifies who is responsible for inspection, specifies the type of inspection required, references the applicable standard or specification section, states the acceptance criteria, and identifies the record to be generated.
The Three Inspection Types
Every activity in an ITP is assigned one of three inspection designations:
| Type | Symbol | Meaning |
|---|---|---|
| Hold Point | H | Work may not proceed past this point until an inspection has been performed and authorization has been given. The work stops. |
| Witness Point | W | The responsible party must be notified and given an opportunity to witness the inspection. Work may proceed if the party does not attend. |
| Review Point | R | The responsible party reviews the documentation or completed work. No physical stop to the work. |
For structural concrete on most U.S. construction projects, pre-pour rebar inspection is typically designated as a Hold Point. This means no concrete can be placed until the rebar inspection has been completed and the hold point has been released in writing.
Who Signs the ITP?
On most projects, the ITP is prepared by the general contractor’s quality team, submitted to the owner or owner’s representative for approval, and then used as the governing inspection document throughout construction. On design-build or contractor-quality projects, it may be prepared by the QA/QC manager directly.
The ITP is not a contract deliverable to be submitted, approved, and filed away. It is a living field document. It should be on the site, referenced before each inspection, and updated as the work progresses.
Quality Jobsite offers a growing library of free and paid inspection tools — visit the Free Resources page to download the Free Rebar Inspection Checklist and explore what’s available.
Hold Points: The Quality Gate Before Concrete Is Placed

A hold point is the quality system’s most important control mechanism. It is a mandatory stop in the construction sequence that requires a documented inspection and a written authorization before work can proceed.
Pre-pour rebar inspection is the most common and consequential hold point on concrete construction projects. Once concrete is placed, it cannot be removed without significant cost, schedule impact, and structural risk. The hold point exists precisely to prevent that outcome.
What Happens at a Hold Point
- The work reaches the designated stage (e.g., all rebar placed, chairs installed, forms clean)
- The contractor notifies the inspector that the element is ready for inspection
- The inspector performs the physical inspection against the approved drawings and specifications
- The inspector documents the findings — conforming items, non-conformances, and measurements
- The inspector makes one of three decisions:
- Approved: All items conform. The pour is authorized.
- Conditional: Minor items to be addressed. Authorization granted with specified conditions.
- Hold: Significant non-conformances. Pour is not authorized. NCR issued. Re-inspection required.
- The authorization (or hold notice) is signed by both the inspector and the contractor representative
Without a signed release, no concrete is placed. This is not optional, and it is not subject to schedule pressure.
A Concrete Example: Rebar Pre-Pour Inspection
Before a structural slab pour, a QA/QC inspector will typically verify:
- Bar sizes and quantities: Do the bars in place match the structural drawings?
- Concrete cover: Is the specified cover maintained at all locations? Is it measured and recorded?
- Lap splice lengths: Are all laps measured and conforming to applicable ACI 318 development length and splice requirements?
- Bar condition: Is the steel free from mud, oil, excessive rust, and damage?
- Supports and chairs: Are covers maintained by appropriate supports at adequate spacing?
- MTR verification: Are Mill Test Reports on file for all heat numbers on site?
The Free Rebar Inspection Checklist covers all of these items in a single structured, field-ready form.
Download the Free Rebar Inspection Checklist
The Free Rebar Inspection Checklist covers 60+ pre-pour inspection items across material verification, bar placement, concrete cover, lap splices, hooks, hold points, and inspector sign-off. 14-page print-ready PDF — referenced to ACI 318, ACI 117, ASTM A615/A706. Free.
Non-Conformance Reports: Documenting and Closing Quality Problems

Not every inspection will pass. When an inspection identifies work that does not conform to the contract documents, that non-conformance must be documented, assigned to a responsible party, resolved through corrective action, and verified through re-inspection before the work continues.
The document that manages this process is the Non-Conformance Report (NCR).
What a Construction NCR Contains
A complete NCR includes:
- NCR number (for tracking and log reference)
- Date issued
- Project name, location, and element (be specific — which pour, which grid line, which footing)
- Description of the non-conformance (what was found, where, and what the requirement is)
- Drawing or specification reference (e.g., « Drawing S-103 requires #5 bars at 12″ o.c. — installed at 14″ o.c. at grid B-4 »)
- Standard reference if applicable: applicable tolerance requirement or project-specific acceptance criteria
- Responsible party for corrective action
- Required corrective action (what must be done to resolve the NCR)
- Corrective action response (written by the contractor — what they did and when)
- Re-inspection date and result
- Inspector closeout signature
The NCR Log
Every NCR issued on a project should be tracked in a running NCR log. The log captures: NCR number, date opened, description, responsible party, target close date, date closed, days open, and current status (Open / Closed / Contested).
An NCR log serves two purposes:
- Operations: Ensures nothing falls through the cracks. Open NCRs that are aging past 7 days should be flagged for management attention.
- Documentation: Provides a complete project quality history that can be reviewed at final inspection, during owner turnover, or in a dispute.
An NCR that is never closed is not just an administrative failure. It is a contractual and legal exposure. At project closeout, all NCRs should be formally closed or have a documented disposition (accepted as-is with engineer approval, repaired, replaced, or reworked to conformance).
Daily Quality Inspection Reports: Your Field Record
The daily quality inspection report is the construction team’s single most important protection in a warranty claim, a contract dispute, or an insurance investigation.
Here is why: when a quality problem is discovered after the work is complete or the building is occupied, the only way to demonstrate that an inspection was performed, the work conformed at the time, and proper documentation was maintained is through contemporaneous written records. Records written at the time of inspection. Not reconstructed after the problem was found.
What a Daily Quality Report Should Include
A standard daily quality inspection report covers:
- Project name, date, weather conditions, and temperature
- Inspector name, company, and certification number
- Work activities inspected (by element, location, and trade)
- For each activity: result (conforming, NCR issued, or conditional)
- Hold points reached and their disposition (approved, held, conditional)
- Materials received and verified (heat numbers, delivery tickets, MTR status)
- NCRs issued (number, location, description)
- Photos taken (reference numbers and locations)
- Outstanding items from previous reports
- Inspector’s signature and printed name
A daily report does not need to be long. A well-organized single-page form filled in consistently on every day of inspection is worth more than a detailed report filed inconsistently.
Practical rule: If you didn’t write it down, it didn’t happen. In a dispute, A signed, dated inspection record is much stronger than relying on memory after the fact. Your signed, dated, contemporaneous inspection record does.
The Quality Jobsite Shop will include daily quality report templates, NCR trackers, and complete QA/QC starter packs — visit the Shop to see upcoming tools.
Roles and Responsibilities in a Construction Quality System
One of the most common causes of missed inspections and unclosed NCRs is unclear responsibility. Everyone assumes someone else is handling it.
A functioning quality system assigns specific responsibilities to specific roles.
The General Contractor’s QA/QC Manager or Quality Representative
Responsible for maintaining the quality system: writing and updating the ITP, tracking NCR log status, ensuring hold points are not bypassed, reviewing daily inspection reports, coordinating with the owner’s representative, and maintaining the project quality file.
On large projects, this is a full-time role. On smaller projects, this function is shared with the superintendent or project manager.
The QA/QC Inspector (or Special Inspector)
Responsible for physically performing inspections — measuring cover, verifying bar sizes, checking splice lengths, observing concrete placement, recording results. Issues NCRs when non-conformances are found. Signs inspection reports and hold point authorizations.
On projects with third-party special inspection requirements (IBC Chapter 17, DOT, owner-required), the special inspector is an independent party — not the contractor’s employee. Their inspection reports and NCRs carry contractual weight.
The Superintendent
Responsible for the construction sequence. Ensures work is ready for inspection at the right stage. Notifies the inspector before hold points are reached. Does not authorize pours or other covered work without a signed inspection release. Receives and reviews NCRs and ensures corrective actions are completed.
The Subcontractor Foreman (Rebar, Concrete)
Responsible for the work being inspection-ready. Ensures bars are clean, chairs are properly spaced, laps are correct, and all material has been verified before calling for inspection. Signs the contractor representative line on hold point forms.
The Engineer of Record (EOR)
Does not typically perform day-to-day inspection but must be consulted when:
- An NCR involves a potential structural impact
- A hold point requires EOR authorization per the ITP
- A contractor proposes a material substitution or design deviation
- A question arises about specification or drawing intent that cannot be resolved in the field
How Small Contractors Can Build a Simple QA/QC System
A full quality management system with a QCP, QMP, and full ITP library is appropriate for large projects and companies with dedicated quality departments. For small and mid-size contractors, a proportionate but effective system is both achievable and essential.
Here is a practical starting framework:
Step 1 — Identify Your Inspection Points
Before the project starts, review the drawings and specifications and list every activity that requires inspection. For a concrete project, this typically includes: rebar placement, pre-pour (full element), concrete placement, curing, and formwork removal.
For each activity, decide: who inspects it, what they check, and what record they create.
Step 2 — Get the Right Forms
You do not need to create forms from scratch. You need field-ready forms that cover your inspection points, reference the applicable standards, and include space for measurements, NCR references, and signatures. Start with:
- Pre-pour rebar inspection checklist
- Pre-pour hold point authorization form
- NCR Issue Form
- Daily quality inspection report
The Free Rebar Inspection Checklist covers the most critical pre-pour inspection in one organized 14-page form — and it’s a free download on the Free Resources page.
Step 3 — Establish the Hold Point Rule
One rule, consistently enforced: no concrete is placed without a signed inspection release. No exceptions for schedule pressure, crew availability, or « we’ve done it a hundred times before. » One missed inspection that leads to rework will cost more than the entire project’s inspection budget.
Step 4 — Maintain the NCR Log
Every quality problem found in the field gets an NCR number and goes on the log. Every NCR gets a responsible party and a close date. Every closed NCR gets a re-inspection confirmation and a signature.
At the end of the project, the NCR log is closed, all items are resolved, and the log becomes part of the project quality file.
Step 5 — Build the Project Quality File
Start a project quality file on Day 1. It contains:
- Approved submittals (shop drawings, MTRs, product data)
- ITP (or inspection point list for smaller projects)
- Inspection reports (daily reports, hold point authorizations)
- NCR log and all NCR forms
- Any EOR correspondence related to quality issues
- Lab test reports (concrete cylinder breaks, etc.)
This file is your quality record. Keep it organized. Keep it current. If a warranty claim arrives three years after project completion, this file can make a major difference in defending the quality of the work performed.
Download the Free Rebar Inspection Checklist
Start building your QA/QC system with the most-used pre-pour inspection tool on Quality Jobsite. The Free Rebar Inspection Checklist covers every critical step before a structural concrete pour — from MTR verification to hold point sign-off.
Common Quality Mistakes That Lead to Rework
Understanding where quality failures originate helps prevent them. These are the most commonly documented root causes of construction rework on concrete and rebar projects:
| Mistake | Consequence | Prevention |
|---|---|---|
| Rebar placed before MTRs verified | Wrong grade or non-conforming steel in structure | Verify MTRs before first bar is placed |
| Cover not measured — only visually confirmed | Insufficient cover discovered after pour or during coring | Use a cover wheel or tape measure; record at 5+ points |
| Lap splice length not checked | Short laps — splice failure risk, structural concern | Measure and record every lap, not just random checks |
| Hold point bypassed due to schedule pressure | Pour proceeds with uninspected rebar; deficiency found later | Enforce the hold point rule — no exceptions |
| NCR issued verbally, never written | Problem forgotten; work covered; NCR never closed | Every NCR gets a written form and a log entry |
| Daily reports not completed | No quality record for the pour date; dispute exposure | Make daily reports a non-negotiable end-of-day task |
| Incorrect drawing revision in field | Work built to old dimensions or quantities | Control drawings — mark approved revision on all field sets |
Construction Quality Management: Summary Checklist
Use this checklist as a quick reference before and during any structural concrete project:
Before Work Begins
- Specifications and approved drawings distributed to field team
- Approved submittals (MTRs, shop drawings) on file before first delivery
- ITP (or inspection point list) prepared and approved
- Quality forms in hand: rebar checklist, pre-pour checklist, hold point form, NCR form, daily report
- Roles and responsibilities assigned and communicated
During Rebar Installation
- MTR heat numbers verified against bundle tags on site
- Bar sizes and quantities checked against structural drawings
- Concrete cover verified at multiple locations with a cover wheel or tape
- Lap splice lengths measured and recorded
- Chairs and supports confirmed in place and adequate
- Element clean: no mud, oil, or debris on bars or in forms
At the Hold Point (Pre-Pour)
- Inspector notified — sufficient lead time for inspection
- All inspection items documented on checklist
- NCRs issued for any non-conformances found
- All open NCRs resolved or have approved disposition before pour
- Hold point authorization signed: Inspector + Contractor Representative
- Pour authorized in writing — not verbally
During and After the Pour
- Concrete delivery tickets reviewed (mix design, water-cement ratio, temperature, slump, air)
- Concrete cylinders taken per spec requirements
- Placement and consolidation observed and documented
- Daily quality inspection report completed and signed that day
At Project Closeout
- All NCRs on the log are formally closed
- All daily inspection reports filed in project quality file
- All hold point authorizations in project quality file
- Lab test results (cylinder breaks) on file and reviewed
- Project quality file organized and submitted or archived per contract requirements
Conclusion: Quality Is a System, Not a Personality
The most experienced inspector on your project cannot protect your company if there are no records. The most diligent superintendent cannot prevent rework if there is no system requiring inspections before covered work proceeds. The best materials in the world cannot compensate for missed inspection points and poor documentation.
Construction quality management is not about finding problems after they happen. It is about building a system that prevents them from being buried in concrete in the first place.
Start with the right forms. Enforce the hold point rule. Write it down. Close every NCR. Build the project quality file from Day 1.
That is construction quality management in practice.
Download the Free Rebar Inspection Checklist
The best place to start is the inspection that happens before every structural concrete pour. Download the Free Rebar Inspection Checklist — 60+ items, 14 pages, print-ready PDF, referenced to ACI 318, ACI 117, ASTM A615/A706. No cost. No catch.
Related Resources
Visit the Quality Jobsite Blog
Quality Jobsite is an independent publisher. Our tools and guides are referenced to ACI 318, ACI 117, ASTM A615, ASTM A706, and common U.S. construction QA/QC documentation practices. Quality Jobsite is not affiliated with, endorsed by, or certified by the American Concrete Institute (ACI), ASTM International, the International Code Council (ICC), ISO, OSHA, or any other standards organization or government body. Always verify project-specific requirements, contract documents, approved drawings, applicable codes, and direction from the Engineer of Record.
© 2026 Quality Jobsite · https://qualityjobsite.com · Build Quality. Build Trust.